DIY Cat Birthday Cake: A Special Treat for Your Cat!
Imagine the purrs and gentle nudges of gratitude you’ll get from your
Crafting a special treat for your
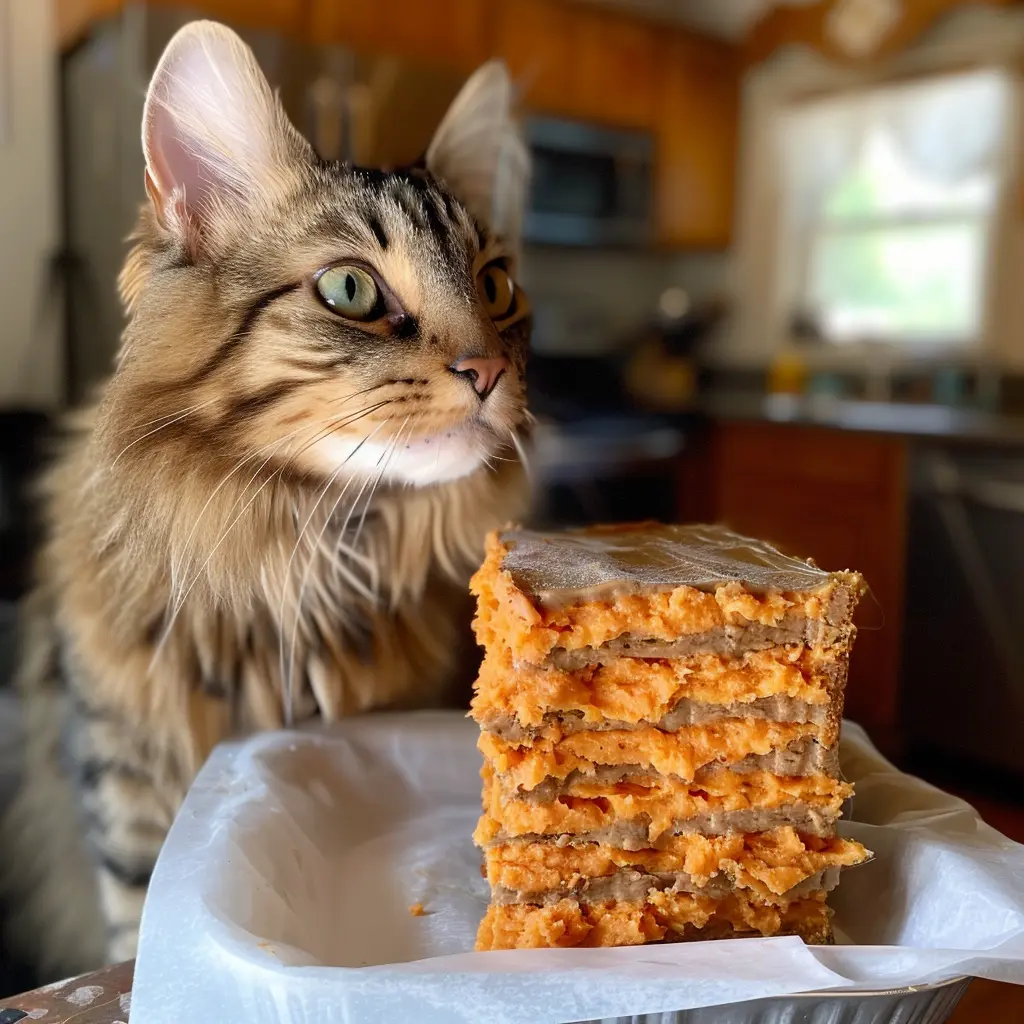
With ingredients like tuna, sweet potato, and a hint of catnip, these cakes are designed to cater to your
Ingredients List
When it comes to whipping up a birthday treat your kitty won’t soon forget, choosing the right ingredients is crucial.
We’re talking about a mix of flavor and nutrition, tailored for a purr-fect celebration.
For the Cake
- 50g of sweet potato, mashed – Why sweet potato? It’s not only a great source of dietary fiber but also vitamin B6, vitamin C, and beta-carotene. Remember, moderation is key.
- Half a tin of tuna in spring water, drained – Tuna is a fantastic source of omega-3 fatty acids and is something most cats can’t resist. Just make sure it’s in spring water and lacks additional fats or oils.
- 1 teaspoon of plain flour – This acts as a binding agent to keep everything together. You don’t need much, just a sprinkle.
- Plain instant mashed potatoes – Prepared and cooled. It’s smooth, it’s creamy, and guess what? It’s safe for cats in small amounts. Plus, it pipes well for that fancy finish.
- A pinch of catnip – It’s like the confetti on top! Sprinkle it over the cake to give your furry friend a little extra buzz.
Required Equipment
Before we jump into the crafting of this delightful
- Small Baking Pan: Think compact. A small pan will help shape the cake into a manageable size for your feline friend. If you’re aiming for those cute, individual cakes, a muffin tin works wonders too!
- Wax Paper: This is a must for lining your pan. It makes removing the cake a breeze without leaving any sticky messes behind.
- Medium Mixing Bowl: This will be your mixing station where all the magic begins. Ensure it’s spacious enough to give all your ingredients a good stir.
- Measuring Cups and Spoons: Precision is key! Cats have sensitive diets, so sticking to the recipe measurements ensures they enjoy their treat without any tummy troubles.
- Round Cutter (3-inch): To shape your cake patties uniformly. No round cutter? No problem. An empty can with both ends removed does the trick just fine.
- Fork or Potato Masher: Essential for flaking your salmon and mashing up the sweet potato. Chunky is good for stew, not so much for a refined
cat cake. - Spatula: For spreading the yogurt and peanut butter layers. A small one turns this task into child’s play.
- Freezer: Yup, not your usual ‘equipment’ but necessary. A quick chill session helps firm up the patties, making assembly much smoother.
Preparation Steps
Let’s dive right into getting everything set up for your kitty’s celebratory treat! Follow these steps to ensure a smooth and safe preparation process for the special day.
Prepare Ingredients
- Mash the Sweet Potato: Start by peeling and boiling a medium-sized sweet potato until it’s tender. Once done, mash it until there are no lumps—smoothness is key here. You’ll need about 50 grams of mashed sweet potato for the cake.
- Prepare the Tuna: Grab half a tin of tuna in spring water—ensure it’s drained well to avoid any unnecessary moisture in the cake.
- Measure the Flour: You’ll need just a teaspoon of plain flour to help bind everything together. Sift it to avoid any clumps that could mess with the texture of your cake.
- Mix Ingredients: In a medium mixing bowl, combine the mashed sweet potato, drained tuna, and sifted flour. Mix them until they’re well integrated. The consistency should be akin to a thick paste, perfect for forming into cake layers later on.
- Shape the Cake: Use a round cutter as a mold to shape the mixture into small cake layers on a wax-paper-lined baking pan. Ensure each layer is compact and even. If the mixture is too sticky, lightly dust your hands with flour while shaping.
- No Harmful Add-ins: While we’re tempted to make kitty’s cake as tasty as possible, avoid onions, garlic, and excessive salt, which are harmful to cats. Stick to the ingredients listed.
- Wash Hands Thoroughly: Always wash your hands before and after handling ingredients, especially raw ones like tuna, to prevent any contamination.
- Check for Allergies: If this is the first time you’re introducing any of these ingredients to your
cat , keep an eye out for any allergic reactions. It’s rare, but always better to be cautious. - Proper Storage: If not serving immediately, store the cake layers in the refrigerator. Cover them to avoid absorbing odors and ensure they remain fresh.
Baking the Cake
Preparing a birthday cake for your furry companion doesn’t have to be complicated. Let’s jump into making a nutritious and delightful cake that your
Mixing Ingredients
First things first, let’s get our ingredients together. You’ve got your sweet potato mashed up nicely, the tuna drained and ready, and the flour measured out. Now, the key here is to mix these components gently.
Overmixing isn’t what we’re aiming for, since we want the cake to have a nice texture that your
I usually use a fork for mixing because it allows me to combine everything thoroughly without making it too dense.
Just stir until you see that the tuna is evenly distributed throughout the sweet potato, and there are no big lumps of flour visible.
Easy does it!
Baking Instructions
Once your mixture is ready, it’s time to bake this lovely treat.
Preheat your oven to 350 degrees F.
This is a perfect temperature to cook the cake thoroughly without burning the edges or leaving the center too moist.
Pour the mixture into a greased muffin tin or a small cake mold if you want to get fancy.
I like using a muffin tin for portion control—makes it easier to serve and store any leftovers. Fill each section about two-thirds full.
This allows the cake to rise without spilling over.
Bake in the oven for about 15 minutes. You’ll know it’s done when the top is golden and a toothpick inserted into the center comes out clean. Always keep a close eye near the end of the baking time since every oven is a bit different.
Once baked, let the cakes cool in the pan for a few minutes, then transfer them to a wire rack.
Cooling is crucial—it not only helps the cake set but also makes it safer and more enjoyable for your kitty to eat.
After all, who would want to burn their tongue on their birthday?
Decorative Tips
Creating a birthday cake for your
Making Cat -Safe Frosting
Cats can’t have sugar, but who says they can’t have frosting? For a completely pet-safe option, plain mashed potatoes make an excellent choice. Just ensure they’re unsalted and unseasoned. Here’s my go-to method:
- Choose a plain instant mashed potato mix or make your own from scratch. Remember, no garlic or onion powder!
- Prepare the mashed potatoes as usual but skip any additives like butter or milk.
- Once the potatoes have cooled, scoop them into a pastry bag fitted with a decorating tip. You’re now set to start frosting!
This alternative not only avoids sugar but also adds a savory touch that cats adore. Plus, it’s smooth enough to pipe onto cakes but holds its shape nicely.
Decorating the Cake
After you’ve frosted the cake, it’s time to get creative with the decorations. Here are some safe and appealing ideas:
- Crushed
Cat Treats: Use these as a sprinkle over the top. It’s like the sprinkles on a cupcake but in a crunchy form cats can enjoy. - Catnip: A little sprinkle of catnip makes a delightful garnish that’s sure to get your kitty excited.
- A Meaty Candle: Yes, instead of a traditional birthday candle, why not use a meaty stick treat? Just make sure it’s safe for cats and remove it before your
cat starts eating.
Serving and Storage
Now that you’ve mastered the art of crafting a delectable birthday cake for your feline friend, let’s talk about the best ways to serve and store this special treat to keep it fresh and enjoyable.
How to Serve
When it’s time to celebrate, you’ll want to make sure that your
First, ensure that the cake has cooled down to room temperature.
Hot or warm cakes might discourage your
Serve the cake on a flat dish or a
Also, while it’s tempting to let your
Moderate the portion to avoid any upset tummies. A good rule of thumb? A piece about the size of their regular serving of wet food should suffice.
After singing “Happy Birthday” (yes, sing to your
Storage Recommendations
Leftover cake?
No problem! Storing the leftover
Place any uneaten cake in an airtight container.
You can store it in the refrigerator for up to three days. Always check the cake for any signs of spoilage—like a sour smell or visible mold—before giving it to your
If you’ve made a larger batch and foresee keeping it for longer, you can freeze portions of the cake. Wrap individual pieces securely in cling film or place them in freezer-safe bags.
Label them with the freezing date, so you don’t forget how long they’ve been stored. Frozen
Remember, every time you remove the cake from the fridge or freezer, let it reach room temperature before serving it to your
Conclusion
I hope this guide inspires you to roll up your sleeves and create a delightful birthday treat that’ll make your
Watching your furry friend enjoy a cake made with so much love is truly a rewarding experience. So grab your apron and let the baking begin! Here’s to a purr-fect celebration!
